
Make this very easy DIY Distressed Floral Vase and decorate your home for the season or holiday of your choice.
I love decorating my entryway table for all the special “holidays” and seasons that we have. Whether that is Valentines Day, St. Patricks Day, Easter or even Spring or Summer. I love finding those little pieces that say “buy me” at Home Goods, IKEA or even at World Market. However, some things I much prefer to make for myself. For example, I love seeing a bouquet of flowers as soon as I walk in the door. There’s just something about flowers that brightens up everyone’s day. I mean, come on, how can you stay angry after looking at beautiful bouquet? While I would LOVE to receive fresh flowers on a regular basis or even decorate my home with them, my budget doesn’t allow for it. So every once in a while I may pick up some very inexpensive silk bouquets and use them around the house. Not only do they save me money, because I don’t have to replace them too often, but you can also find some really beautiful ones that look exactly like the real thing. Spray some fragrance on them, and you’ll have a lovely bouquet that just lights up the room. Now it’s one thing to have the flowers, but you’re also going to need a vase to go along with it. I love unique looking things. I’m also a bit old school. Blame it on my age. I also happened to have a few mason jars just laying around and we all know that there are so many uses for mason jars. So I decided, why not just turn them into vases with a twist, and that’s exactly what I did. So today I share with you, this super easy DIY Distressed Floral Vases.

DIY Distressed Floral Vase
Supplies Needed:
Wide Mouth Mason Jars
Spray Paint of Choice (Since Easter and Mother’s Day are on the way I went with pastel colors)
Sanding Sponge (60 Grit)
Burlap Ribbon
Burlap Flower Embellishments (Purchased at Michael’s)

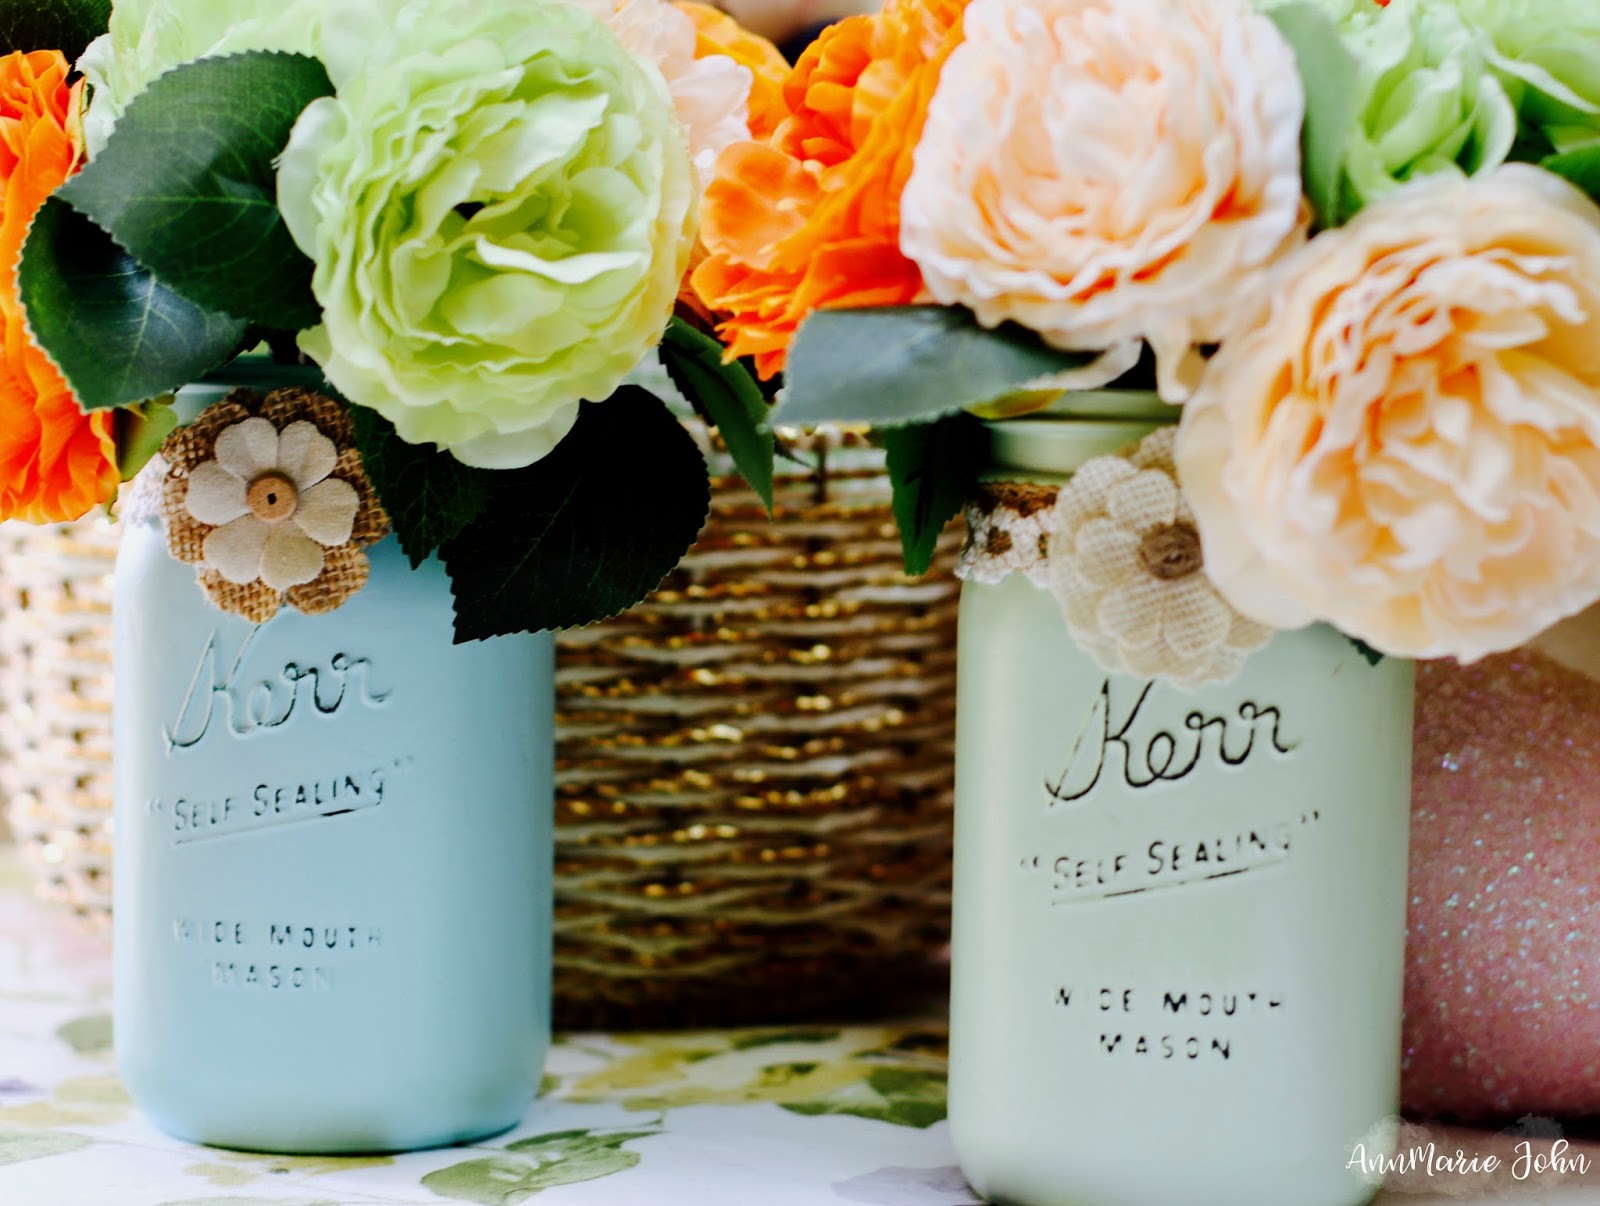
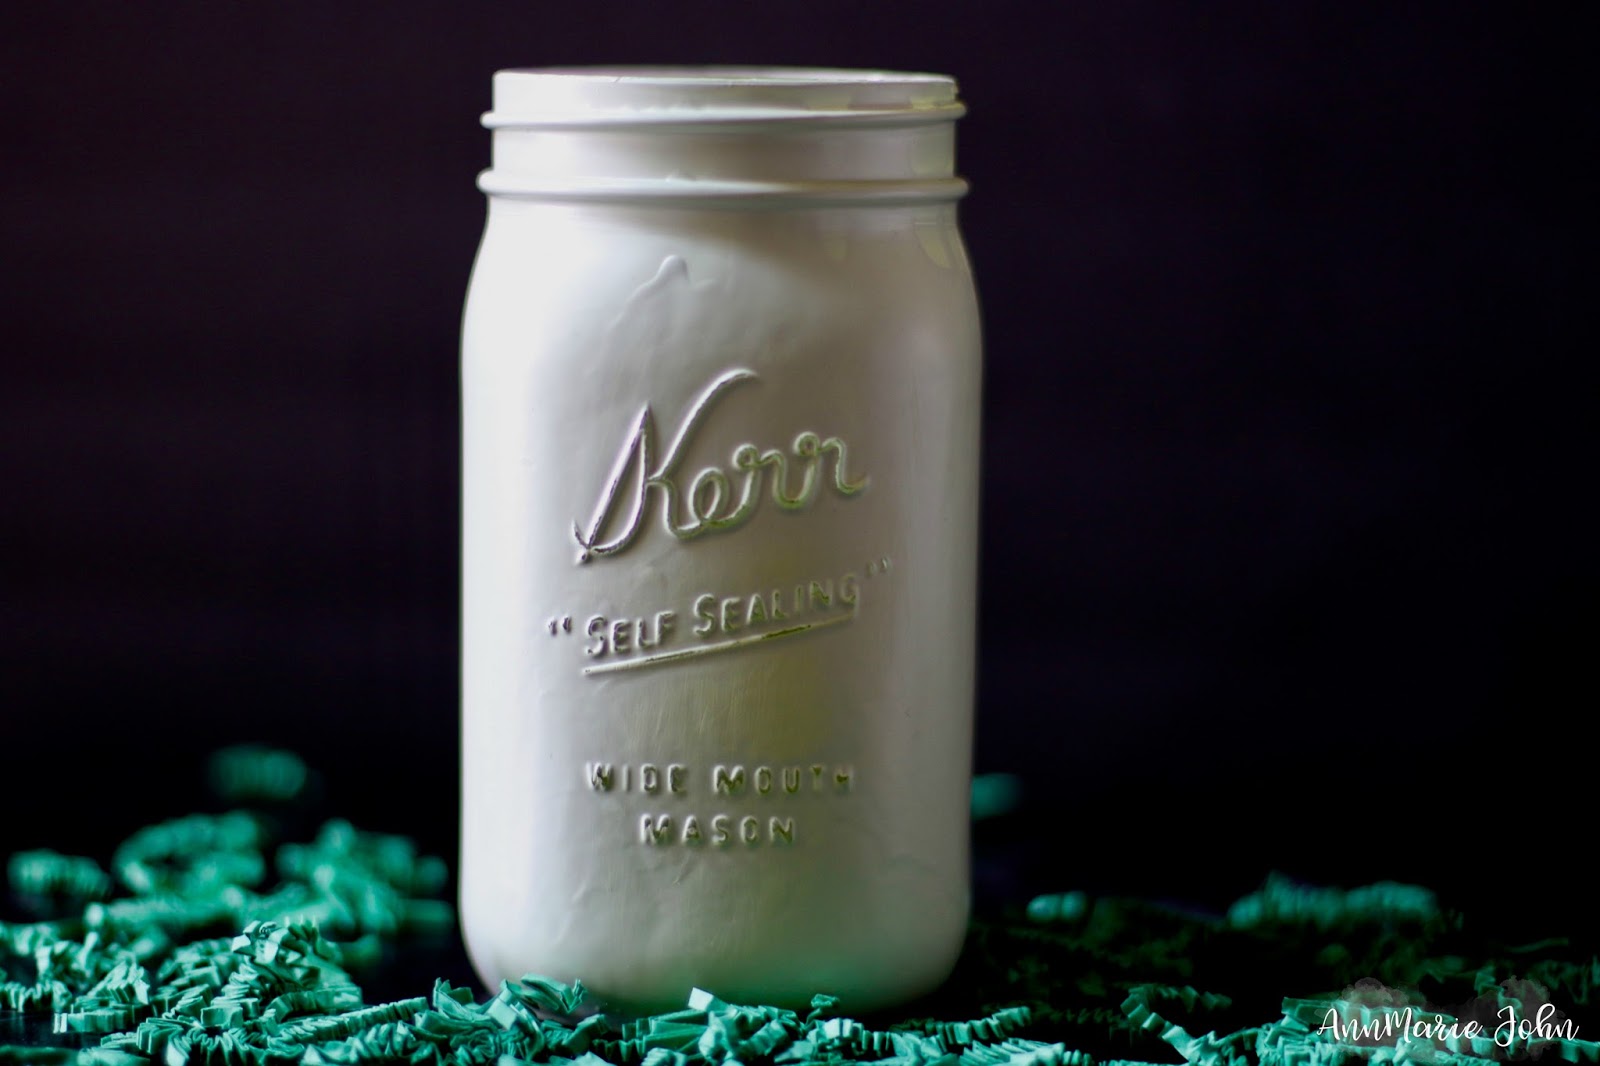
Step 1: In an open area (preferably outdoors), spray your mason jars with your desired color spray paint. While you can hand paint them, spray painting is a much quicker way. I used 3 coats of paint with a wait time of about 30-45 minutes between painting to ensure good coverage. I then let it sit overnight.
Step 2: Once your jar is dry, lightly sand it with your sanding sponge. My jars had words on them so I sanded the words, giving it the distressed look that I wanted. You don’t want to take too much of the paint off, but sand until you’re happy with the way it looks.
Step 3: Once you’re satisfied with the way your vase looks after sanding, attach your burlap ribbon and embellish with the floral embellishments. Now if you decide on using a plain jar without the words you can use the ribbon in the middle of the jar with a big flower. However, we used jars with words and used smaller flowers so that it won’t overpower the words.

Step 4: Add your flowers and place in your favorite spot in your house, anywhere that will brighten up your day and bring a smile to your face.
That’s it, you’re done! Can you believe how easy this was to make? While this project is fairly simple, it does take some time due to the drying process. There are many different ways to do this. If you would prefer not to use as a vase, you can add some of your favorite products and gift with the top on. I just love how versatile mason jars are and the crafting possibilities are endless

Enjoy your DIY Distressed Floral Vase.
